6/24/2018

VVDI2 VAG Change Skoda Octavia 2015 MQB Mileage

Here’s an example of odometer (mileage) correction in the car Skoda Octavia 2015 (VAG MQB platform). The procedure is carried out with the Xhorse VVDI2 VAG key programmer.
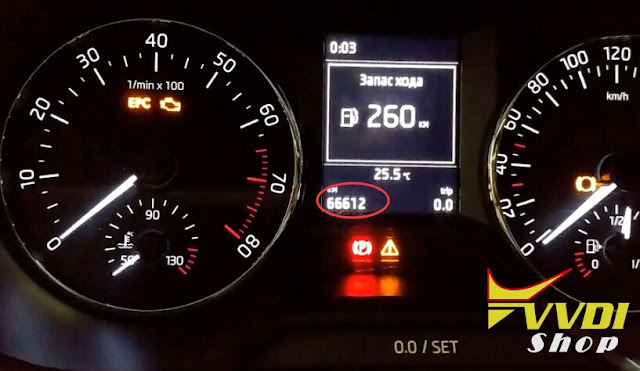
vvdi2-change-km-skoda-mqb-1
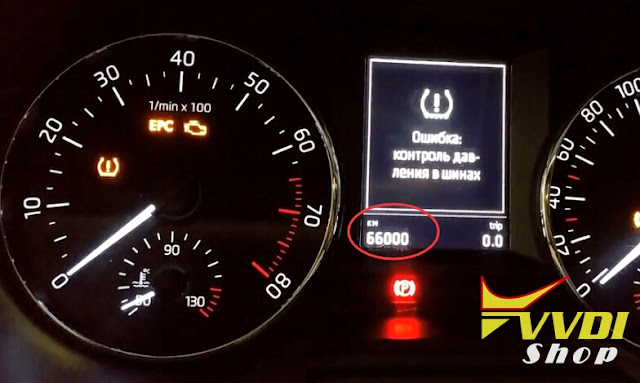
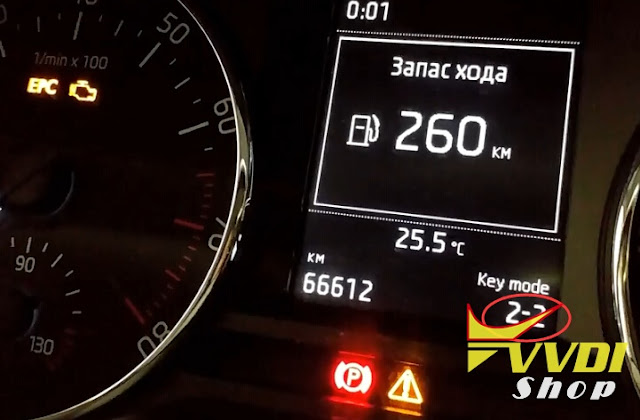
Original mileage: 66,612KM

Open VVDI2 software
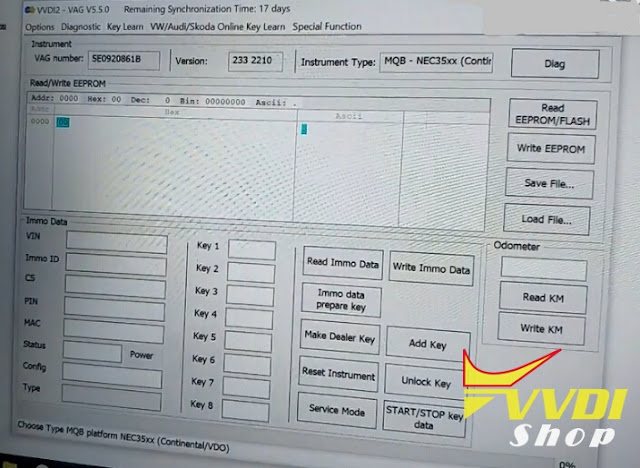
Select Key Learn->MQB platform instrument immobilizer->Instrument with NEC35xx (Continental/VDO)
Click on Diag to load vehicle information
Instrument version 2210
Instrument type: MQB NEC35xx Continental VDO
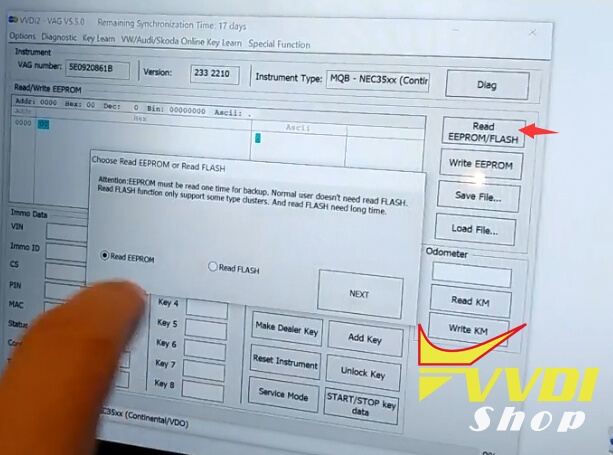
You can read eeprom and save it first.
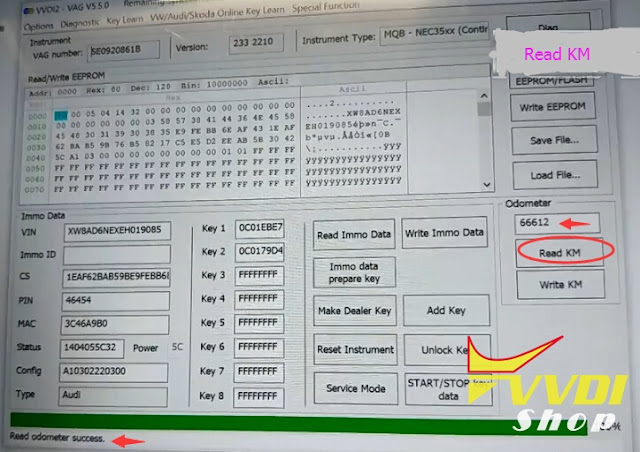
Click on read KM
vvdi2-change-km-skoda-mqb-2
Read odometer success.
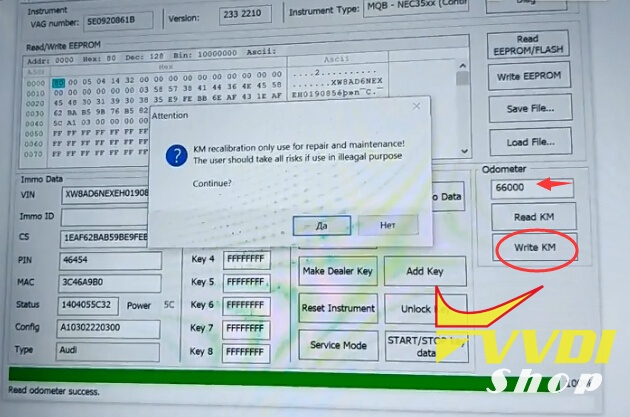
Manually enter odometer you desired
vvdi2-change-km-skoda-mqb-3
Click on Write KM
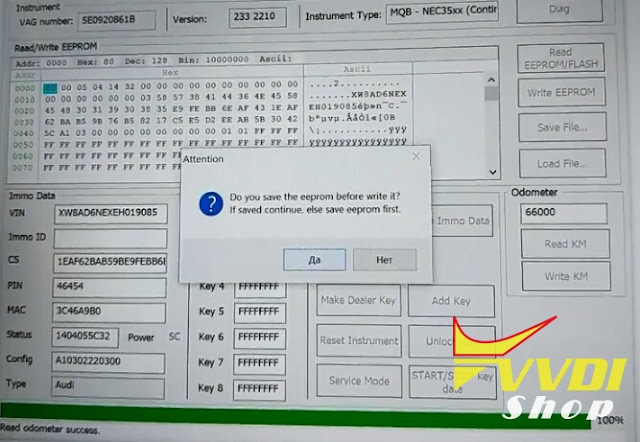
vvdi2-change-km-skoda-mqb-4
vvdi2-change-km-skoda-mqb-5
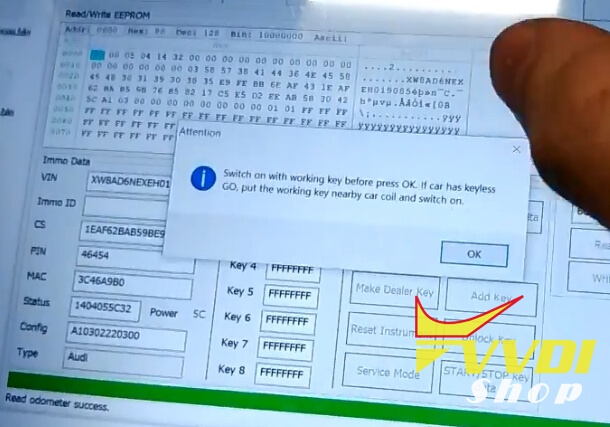
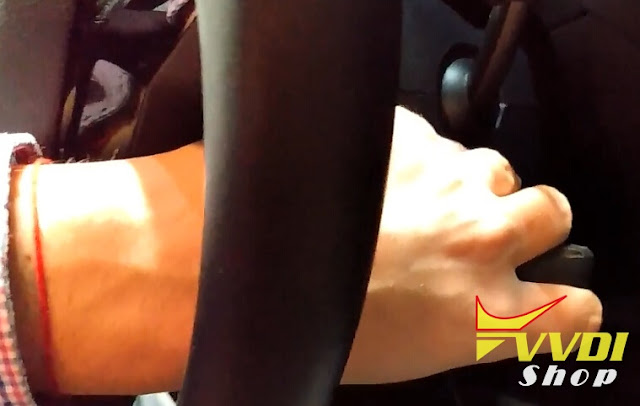
Switch ignition on with working key before press OK. If car has Keyless Go, put the working key nearly car coil and switch on.
vvdi2-change-km-skoda-mqb-6
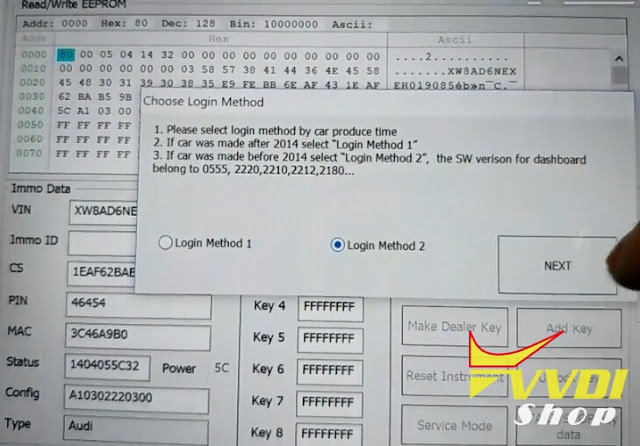
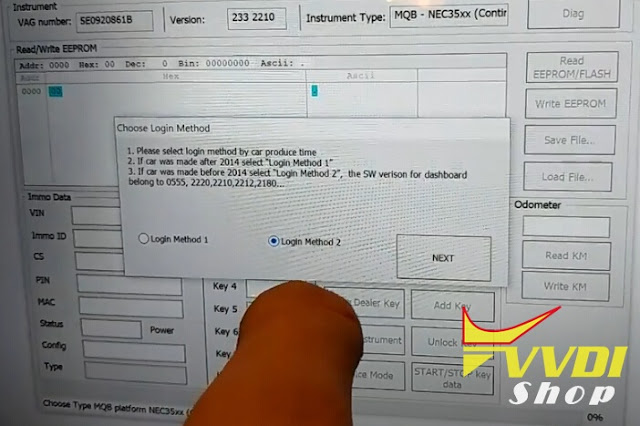
Choose security login:  Login Method 2 (because software version of the dashboard belong to 2210)
vvdi2-change-km-skoda-mqb-7
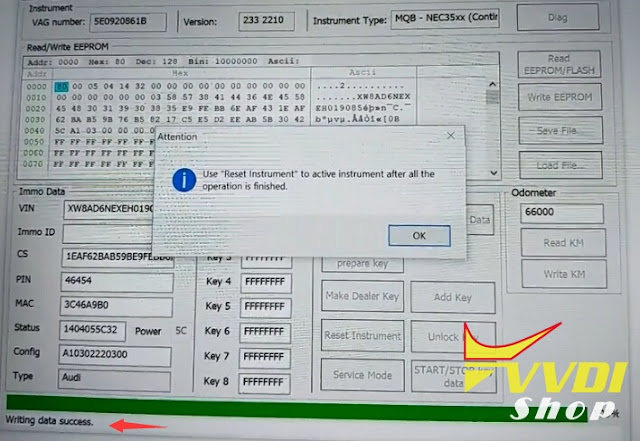
Write data success.
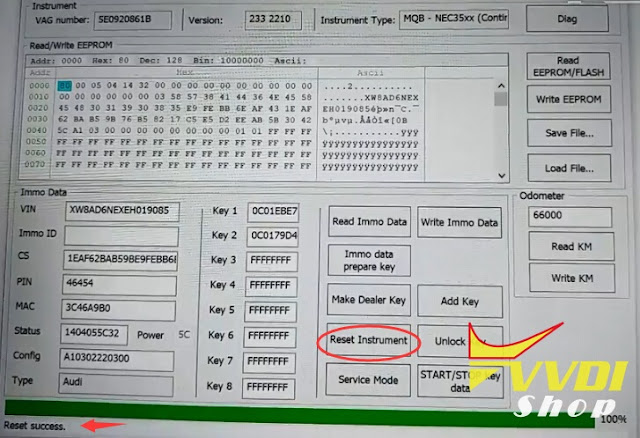
Use “Reset instrument” to active instrument after all the operation is finished.
vvdi2-change-km-skoda-mqb-8
Reset success.
vvdi2-change-km-skoda-mqb-9
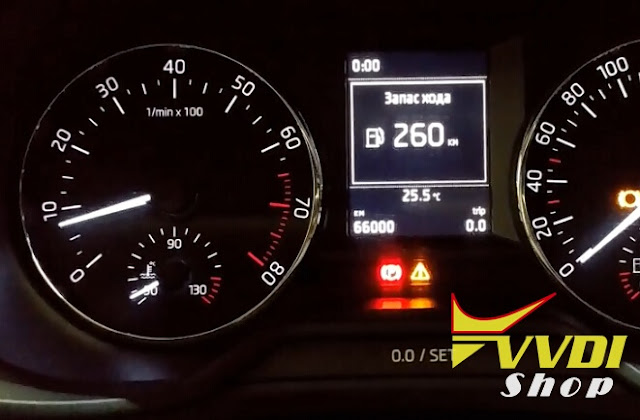
Check mileage on dashboard
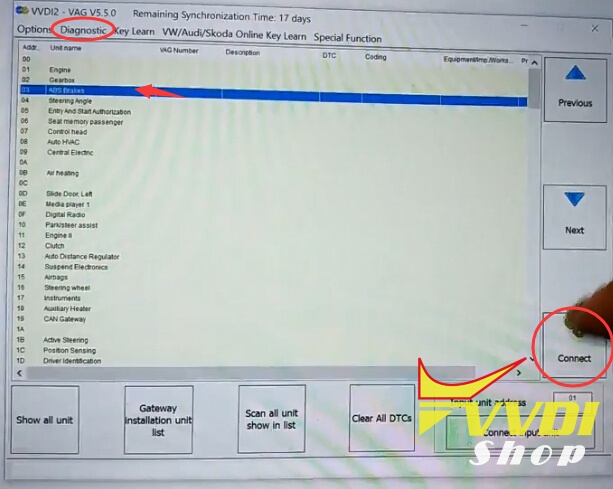
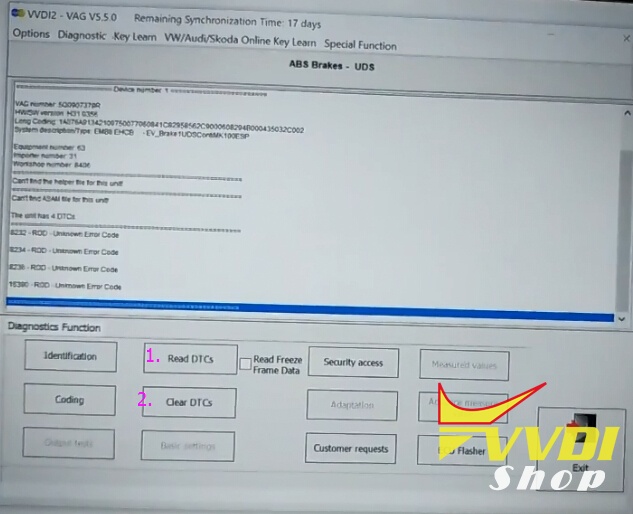
Clear ABS fault codes with VVDI2 software
vvdi2-change-km-skoda-mqb-10
vvdi2-change-km-skoda-mqb-11
vvdi2-change-km-skoda-mqb-12
Done.

http://blog.vvdishop.com/vvdi2-change-mileage-on-skoda-octavia-2015-mqb-system/

6/23/2018

VVDI2 VAG Program Skoda Octavia 2015 MQB Keyless Go

Here’s an example of programming a smart key in the car Skoda Octavia 2015 (MQB platform VAG) using Xhorse VVDI2 VAG key programmer.

Open VVDI2 VAG software
Select Key Learn->MQB platform instrument immobilizer->Instrument with NEC35xx (Continental/VDO)
vvdi2-skoda-octavia-mqb-1
Click on Diag to load vehicle information
Instrument version 2210
Instrument type: MQB NEC35xx Continental VDO
vvdi2-skoda-octavia-mqb-2
Read EEPROM data and save
Switch on with working key before press ok
vvdi2-skoda-octavia-mqb-3
If car has keyless Go, put the working key nearby car coil and switch on
vvdi2-skoda-octavia-mqb-4
Choose Login Method 2, the car software for dashboard belong to 2210
Press Next to continue
vvdi2-skoda-octavia-mqb-5

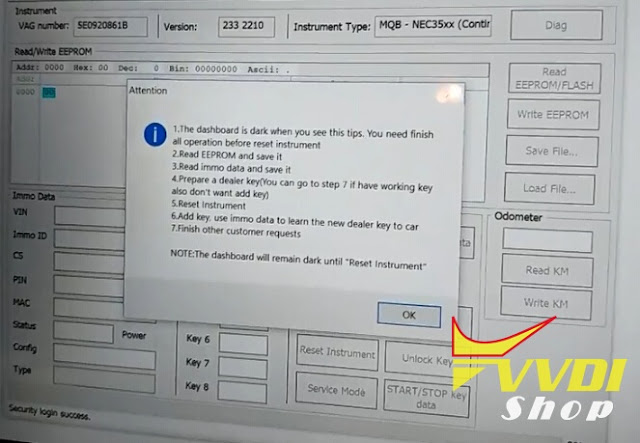
1. The dashboard is dark when you see this tips. You need finish all operation before reset instrument.
2.Read EEPROM and save it.
3.Read IMMO data and save it.
4. Prepare a dealer key (You can go to step 7 if have working key aslo
don’t want to add key)
5. Reset instrument
6. Add key use immo data to learn the new dealer key to car
7. Finish other customer requests.
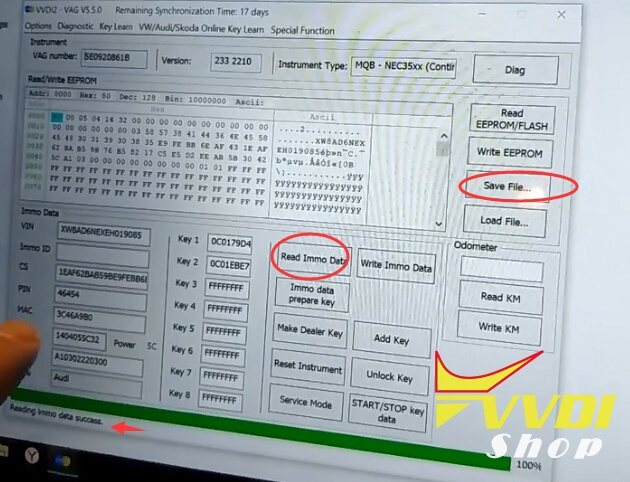
Save eeprom
vvdi2-skoda-octavia-mqb-6
Click on Read Immo data and then save it
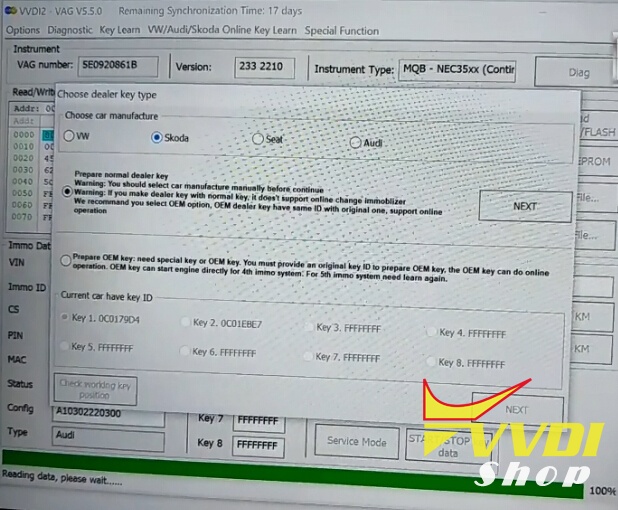
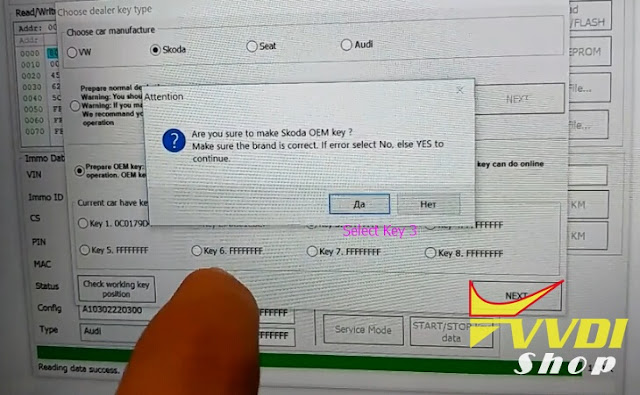
Select Maker Dealer Key->Skoda
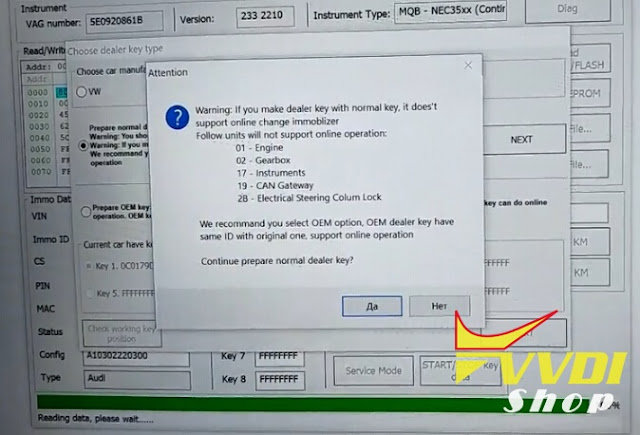
If prepare normal dealer key, follow instructions below:
vvdi2-skoda-octavia-mqb-7
vvdi2-skoda-octavia-mqb-8
Here we select Prepare OEM key
Prepare OEM key: need special key or OEM key. You must provide an original key ID to prepare OEM key. The OEM key can do online operation. OEM key can start engine directly for 4th immo system.
For 5th immo system need learn again.
Select key position 3
Press Next to continue
vvdi2-skoda-octavia-mqb-9
vvdi2-skoda-octavia-mqb-10
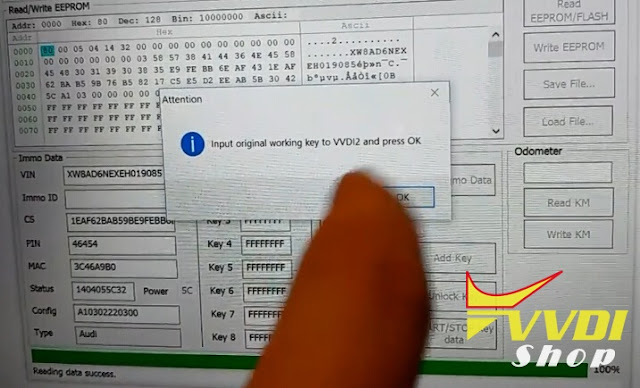
Input original working key to VVDI2 and press OK
vvdi2-skoda-octavia-mqb-11
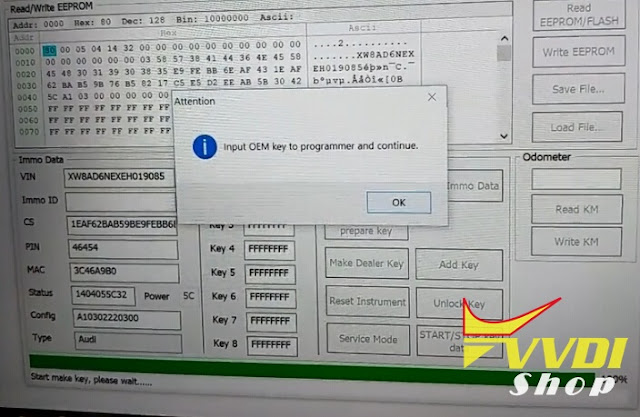
Input OEM key to VVDI2 key programmer and continue.
vvdi2-skoda-octavia-mqb-12
Use “Reset instrument” to active instrument after all the operation is finished.
vvdi2-skoda-octavia-mqb-13
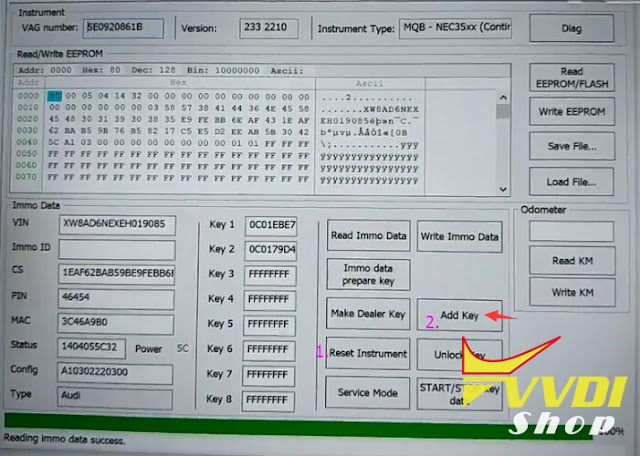
Click on Add key
vvdi2-skoda-octavia-mqb-14
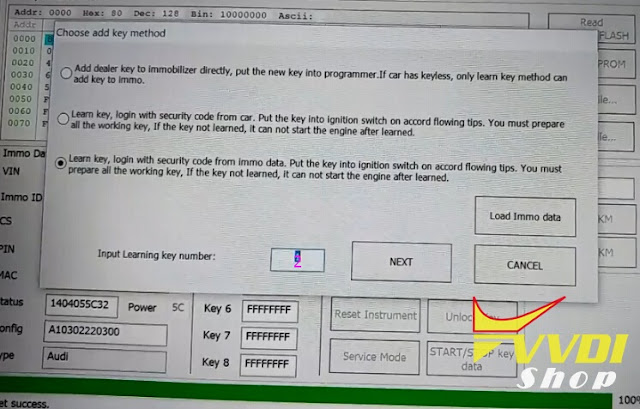
Select Learn key, login with security code from immo data. Put the key into ignition switch on accord flowing tips. You must prepare all the working key.
Select key number to learn: 2
Press Next
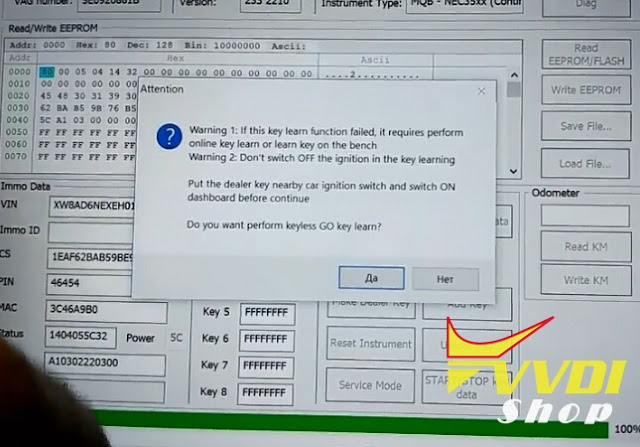
Confirm car has keyless.
vvdi2-skoda-octavia-mqb-15
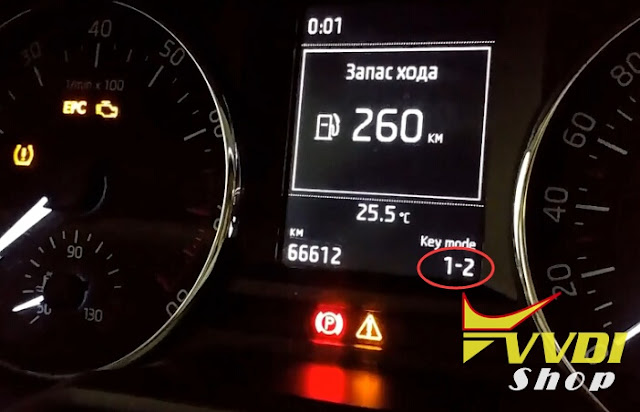
Put the dealer key nearby car ignition switch and switch ON dashboard before continue
vvdi2-skoda-octavia-mqb-16
First key learn succeed
vvdi2-skoda-octavia-mqb-17
Learn second key with VVDI2
vvdi2-skoda-octavia-mqb-18
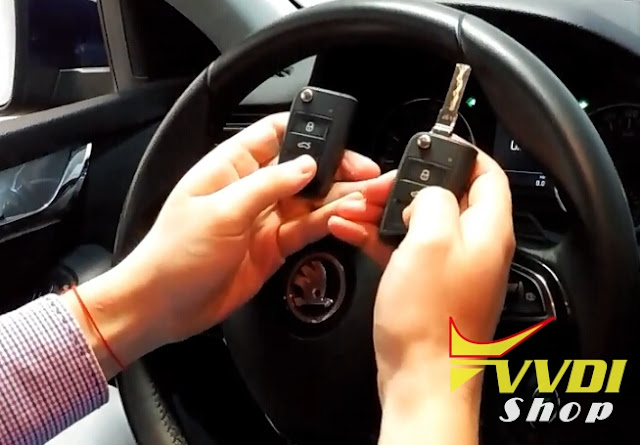
Test the remote control and start car.
Success.

6/20/2018

Xhorse VVDI2 Key Programmer Update to V5.6.0 (2018-06-20)

Xhorse VVDI2 key programmer software Update V5.6.0 on  20th June 2018.
No Firmware Upgrade required
Update Online via Upgrade Tool Now
What’s New Highlights
Finally 1st in the world
all working Remote / Proximity for all JLR – Jaguer & LandRover via RFA/KVM dump, starting + all functionality will work instantly no extra Security Learning OBD programming required.Land rover 2015 all keys lost via transponder prog
vvdi2-v560
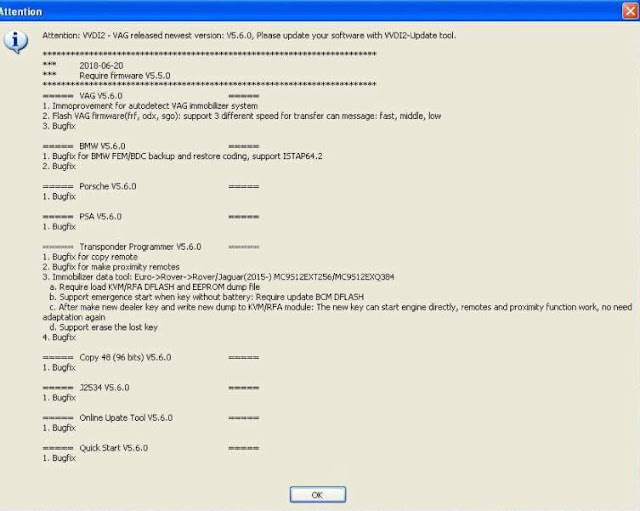
VVDI2 V5.6.0 Update Feature:
*** 2018-06-20
*** Requires firmware V5.5.0
===== VW V5.6.0 =====
1. Improve the automatic diagnosis of the public security system
2. Refresh the original firmware (frf, odx, sgo): Supports fast, medium, and slow 3 refresh modes
3. Other bug fixes
===== BMW V5.6.0 =====
1. Repair BMW FEM/BDC backup and recovery code, support to version ISTAP64.2
2. Other bug fixes
===== Porsche V5.6.0 =====
1. Other bug fixes
===== Peugeot Citroen V5.6.0 =====
1. Other bug fixes
===== Key Programmer V5.6.0 =====
1. Fix remote copy instability
2. Fix the issue of smart card generation
3. Add write startup: Europe -> Land Rover -> New Land Rover/Jaguar (2015-) MC9S12EXT256/MC9S12EXQ384
a. Need to load KVM/RFA DFLASH and EEPROM data
b. Support emergency start function, need to write back BCM DFLASH data
c. After the key is generated, write new data back to the KVM/RFA module. The new key is started directly. The remote control is intelligent and effective. No additional matching is required.
d. support to erase the lost key
4. Other bug fixes
===== 96-bit 48-copy V5.6.0 =====
1. Other bug fixes
===== J2534 V5.6.0 =====
1. Other bug fixes
===== Online Upgrade V5.6.0 =====
1. Other bug fixes
===== Quick Start V5.6.0 =====
1. Other bug fixes

6/19/2018

VVDI Key Tool Read Hyundai IX35 ID46 Pin Code Success

New test feedback: Hyundai ix35 2011 Pincode from Vvdi key tool vs. lonsdor k518 vs. xtool ps90.
In my case,   Xhorse VVDI Key tool succeed, Lonsdor and Xtool failed.

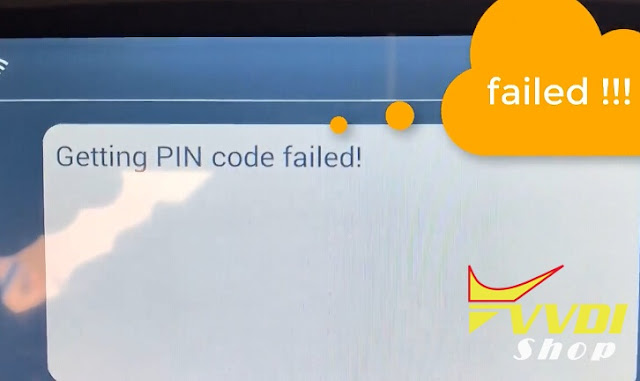
First try Lonsdor K518, failed to read pin
lonsdor-k518-hyundai-pincode-1
lonsdor-k518-hyundai-pincode-2
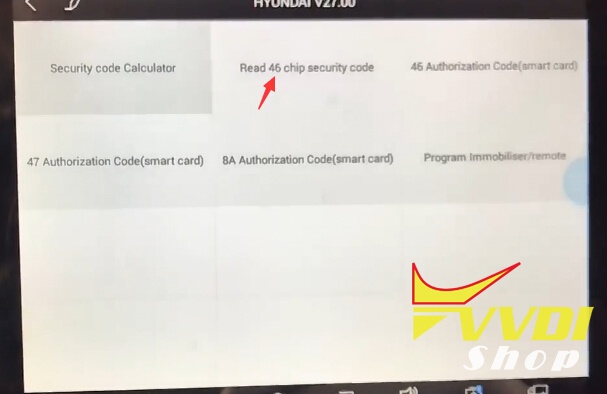
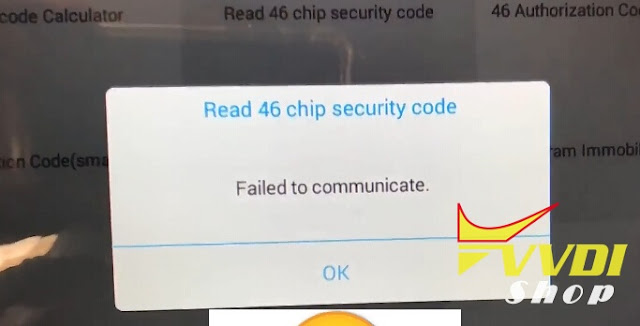
Then try Xtool PS90/X100 Pad2, failed  to communicate either
xtool-x100-pad2-hyundai-pincode-1
xtool-x100-pad2-hyundai-pincode-2
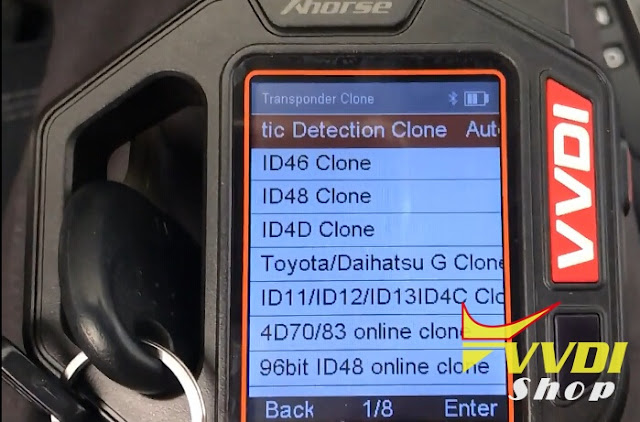
Try VVDI Key Tool, read security pin code no issues
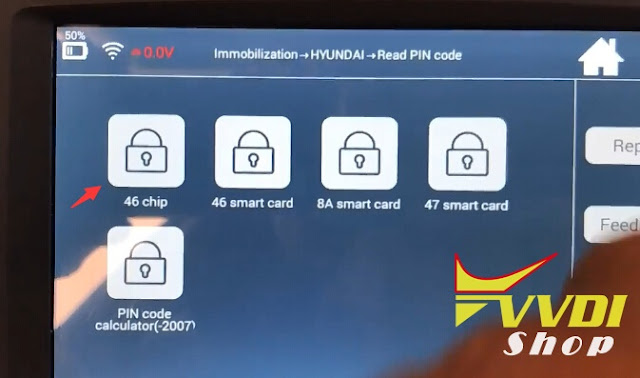
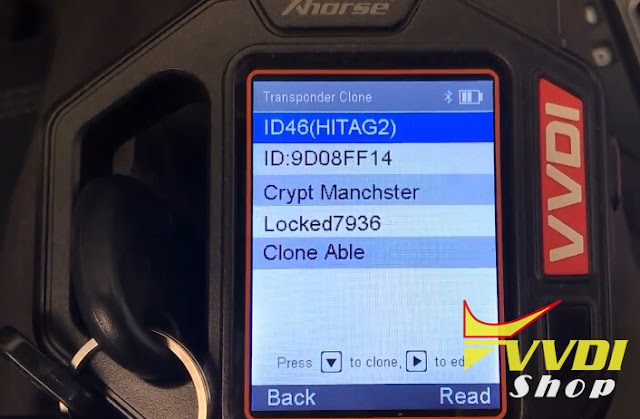
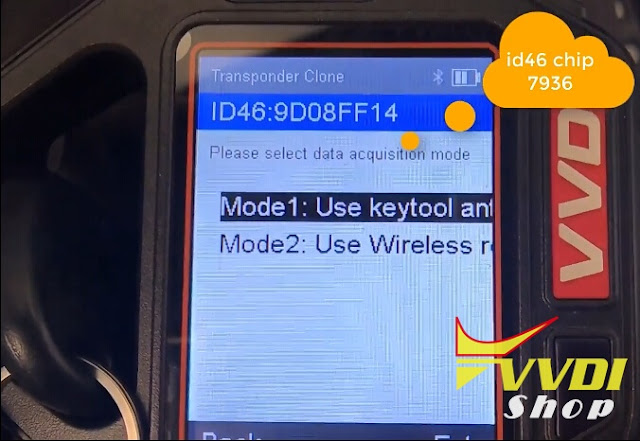
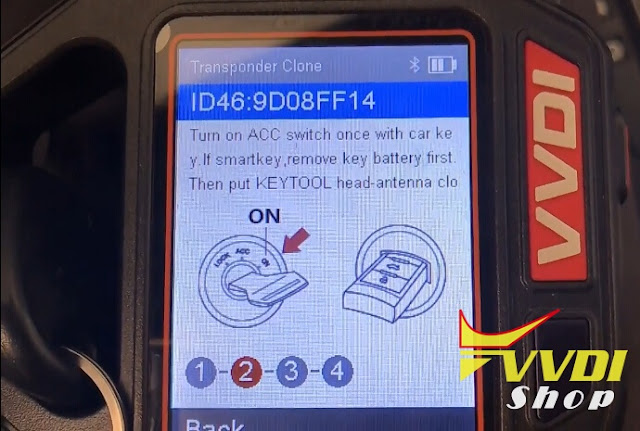
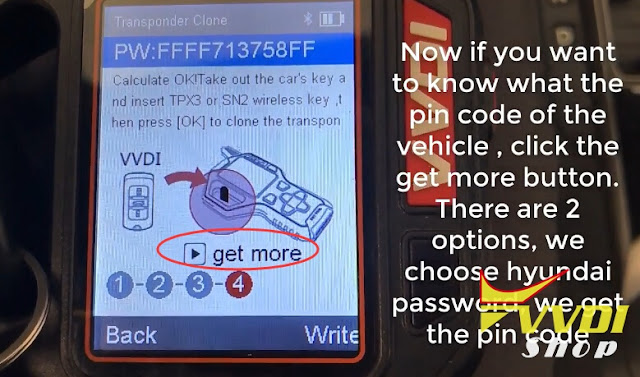
Automatic Detection Clone->Identify ID46 PCF7936 chip->Select Mode 1 data acquisition
vvdi-key-tool-hyundai-pin-code-1
vvdi-key-tool-hyundai-pin-code-2
vvdi-key-tool-hyundai-pin-code-3
vvdi-key-tool-hyundai-pin-code-4
vvdi-key-tool-hyundai-pin-code-5
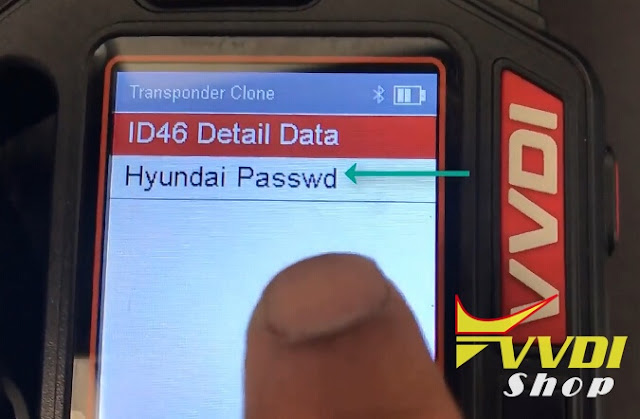
Get More->Hyundai Password
vvdi-key-tool-hyundai-pin-code-6
vvdi-key-tool-hyundai-pin-code-7
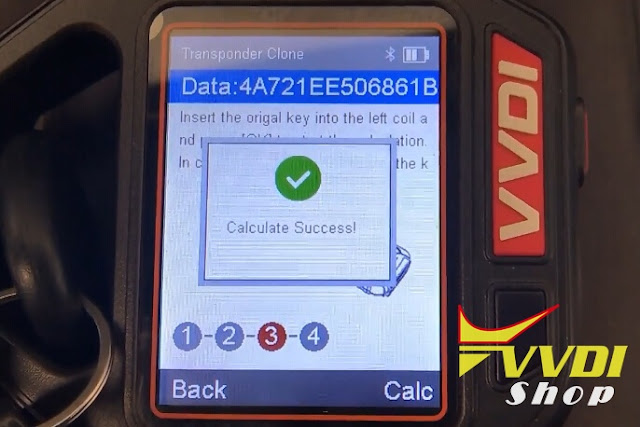
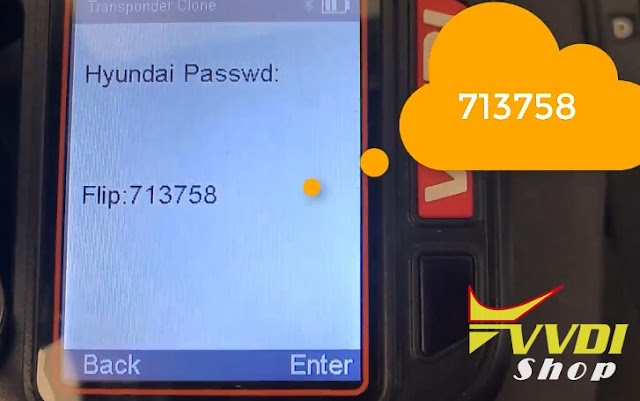
VVDI key tool successfully calculated Hyundai password.
vvdi-key-tool-hyundai-pin-code-8

6/15/2018

Xhorse VVDI Prog V4.7.1 Software Update Feature

Xhorse VVDI Prog programmer software update to V4.7.1 on May, 29th, 2018.

What’s new?
Added more PIC mcu’s
changes in MPC5604
Added Renesas R32C mcu’s

VVDI prog V4.7.1 Update Feature:

v4.7.1              (2018-05-29)
* This version DON't need update firmware
* Fix some bugs
+ Add VVDI PROG USER MUNUAL 4.7.1
  version in Doc folder
+ Add PIC12F508,
  PIC12F509,
  PIC12F510,
  PIC12F519,
  PIC12F609,
  PIC12HV609,
  PIC12HV615,
  PIC12F615,
  PIC12F617,
  PIC12F1571,
  PIC12(L)F1571,
  PIC12(L)F1572,
  PIC12F1572,
  PIC12F1612,
  PIC12F1822,
  PIC12F1840,
  PIC12F752 options in
  <2-MCU>->
+ Add PIC16F505,
  PIC16(L)F1823,
  PIC16(L)F1824,
  PIC16(L)F1825,
  PIC16(L)F1826,
  PIC16(L)F1827,
  PIC16(L)F1828,
  PIC16(L)F1829,
  PIC16(L)F1847,
  PIC16(L)F1613,
  PIC16(L)F1614,
  PIC16(L)F1615,
  PIC16(L)F1618,
  PIC16(L)F1619,
  PIC16(L)F1508,
  PIC16(L)F1509,
  PIC16(L)F1503,
  PIC16(L)F1507,
  PIC16F610,
  PIC16F616,
  PIC16HV610,
  PIC16HV616,
  PIC16(L)F1512,
  PIC16(L)F1513,
  PIC16(L)F1516,
  PIC16(L)F1517,
  PIC16(L)F1518,
  PIC16(L)F1519,
  PIC16(L)F1526,
  PIC16(L)F1527,
  PIC16(L)F1713,
  PIC16(L)F1716,
  PIC16(L)F1717,
  PIC16(L)F1718,
  PIC16(L)F1719,
  PIC16(L)F1703,
  PIC16(L)F1704,
  PIC16(L)F1705,
  PIC16(L)F1707,
  PIC16(L)F1708,
  PIC16(L)F1709,
  PIC16(L)F18313,
  PIC16(L)F18323,
  PIC16(L)F18324,
  PIC16(L)F18344,
  PIC16(L)F17325,
  PIC16(L)F17345,
  PIC16(L)F18326,
  PIC16(L)F18346,
  PIC16F72,
  PIC16F54,
  PIC16(L)F1946,
  PIC16(L)F1936,
  PIC16(L)F1937,
  PIC16(L)F1933,
  PIC16(L)F1934,
  PIC16(L)F1938,
  PIC16(L)F1939,
  PIC16(L)F1947,
  PIC16LF1906,
  PIC16LF1907,
  PIC16LF1903,
  PIC16LF1904,
  PIC16LF1902,
  PIC16F707,
  PIC16(L)F1454,
  PIC16(L)F1455,
  PIC16(L)F1459,
  PIC16(L)F1554,
  PIC16(L)F1559,
  PIC16(L)F1566,
  PIC16(L)F1567,
  PIC16F506 options in
  <2-MCU>->
+ Add PIC18F252,
  PIC18F242,
  PIC18F442,
  PIC18F452,
  PIC18F248,
  PIC18F258,
  PIC18F448,
  PIC18F458,
  PIC18F1220,
  PIC18F2220,
  PIC18F4220,
  PIC18F1320,
  PIC18F2320,
  PIC18F4320,
  PIC18F1230,
  PIC18F1330,
  PIC18F2221,
  PIC18F4221,
  PIC18F4321,
  PIC18F2321,
  PIC18F2331,
  PIC18F4331,
  PIC18F2431,
  PIC18F4431,
  PIC18F2423,
  PIC18F4423,
  PIC18F2523,
  PIC18F4523,
  PIC18F23K20,
  PIC18F43K20,
  PIC18F24K20,
  PIC18F44K20,
  PIC18F25K20,
  PIC18F45K20,
  PIC18F26K20,
  PIC18F46K20,
  PIC18F13K22,
  PIC18F14K22,
  PIC18F2480,
  PIC18F4480,
  PIC18F2580,
  PIC18F4580,
  PIC18F2455,
  PIC18F4455,
  PIC18F2550,
  PIC18F4550,
  PIC18F2525,
  PIC18F4525,
  PIC18F2620,
  PIC18F4620 options in
  <2-MCU>->
+ Add R5F64219,
  R5F6421D,
  R5F64216,
  R5F6421A,
  R5F64217,
  R5F6421B,
  R5F64218,
  R5F6421C,
  R5F64207,
  R5F6420B,
  R5F64206,
  R5F6420A,
  R5F64110,
  R5F64114,
  R5F64111,
  R5F64115,
  R5F64112,
  R5F64116,
  R5F64165,
  R5F64166,
  R5F64167,
  R5F64168,
  R5F64169,
  R5F6417A,
  R5F6417B,
  R5F64175,
  R5F64185,
  R5F64176,
  R5F64186,
  R5F64177,
  R5F64187,
  R5F64178,
  R5F64188,
  R5F64179,
  R5F64189,
  R5F64116J,
  R5F64117J,
  R5F64118J,
  R5F64116K,
  R5F64117K,
  R5F64118K,
  R5F64116L,
  R5F64117L,
  R5F64118L,
  R5F64116M,
  R5F64117M,
  R5F64118M,
  R5F6442F,
  R5F6445F,
  R5F6442H,
  R5F6445H options in
  <2-MCU>->
+ Add CS35(2017) option in <7-AIRBAG>-> 
+ Add FIT(2015) option in <7-AIRBAG>->
+ Add S3(2018) option in <7-AIRBAG>->
+ Add NEW-SANTAFE option in <7-AIRBAG>-> 
+ Add FRM-F-SERIES-XDP512 option in <8-OTHER>->
+ Add FRM-F-SERIES-XEP100 option in <8-OTHER>-> 
+ Add MG_GT_ELEC_POWER_UNIT1(2017) option in <8-OTHER>->
+ Add MG_GT_ELEC_POWER_UNIT2(2017) option in <8-OTHER>->
Use the Xhorse update tool to update software to latest version. 

http://blog.vvdishop.com/xhorse-vvdi-prog-software-update-to-v4-7-1/

6/12/2018

VVDI2 Golf 5 EDC16U1 K-line Not Working Solution

Problem:
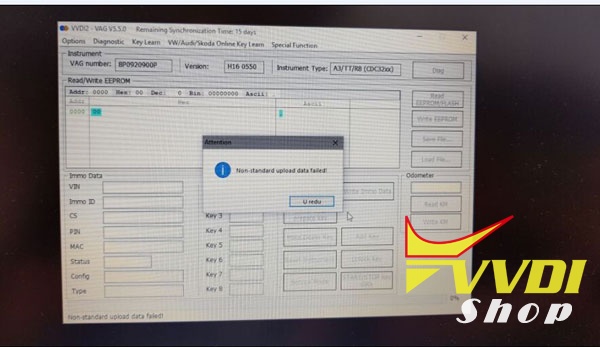
Hi, I have with Xhorse vvdi2 vag v5.5.0 problems with edc16u1 ecu and dashboard.
It can’t read golf 5 2005 year. Something not ok with it
It looks like K line not working.
picture attached:
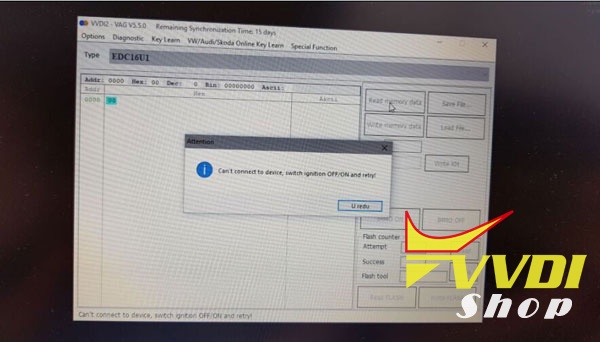
Error “Can’t connect to device. Switch ignition OFF/ON and retry”
vvdi2-cannot-connect-to-device
Error “Non-standard upload data failed”
vvdi2-upload-data-failed
Solved!!!

Here’s the customer solution:
I test it this morning and all works fine now.
I removed soldering ball and i reinstall drivers and all working fine.

It reads now over kline it detects edc16 ecus and it read immo data eeprom and also dashboard it can read now.
I check k line from vvdi2 db25 connector on PCB to the optocupler (relay) omron, and from it to the ADG1606B multiplexer then from multiplexer to the L9637 interface. Then from it to the mcu Rx and TX line. All is ok. Even replace from vvdi 1 L9637 ISO 9141 interface. Didn’t work. Then I measured supply to the omron optocoupler relay it has 1.2 v when activate Kline communication. Check also 120ohm pull down resistors, check supply to the multiplexer ADG1606B it is ok 3.3v ako also on iso 9141(L9637) interface, and also I have on oscilloscope TX and TX signals from mcu to the L9637 it send data when It activate Kline. And in the end I found one solder ball between legs of multiplexer. You can see it on picture that I send you before. First time i open it. That was the main problem and USB drivers.
this is all i tested on this interface. Now all is fine and i can work now ðŸ˜‰
vvdi2-k-line-not-working-solution

Interface is very high quality production, but this is something that happens from time to time.
Hope this helps.