1/20/2026

VVDI Key Tool Max Pro Device Information Error Solution

Problem:

Xhorse VVDI Key Tool Max Pro asks sync device to use online function but fails. It reported a device information error when trying to sync the device.

VVDI Key Tool Max Pro Device Information Error 1

VVDI Key Tool Max Pro Device Information Error 2

Solution:

1. Update firmware first.

2. If still have this error, go to Language to change another language and change another server in APP setting. Then sync device again.

VVDI Key Tool Max Pro Device Information Error 3

Xhorse XT57B Not Match Device Region Error Solution

Problem:

Xhorse VVDI Super Chip XT57B doesn’t generate ID49 chip. It says the chip region not match the current device region Any solution?

Xhorse XT57B Not Match Device Region Error

Solution:

Chips and devices are region locked.

You got the Chinese version XT57B super chip. It only works with CN version xhorse devices.

Do buy XT57B Global English version from vvdishop.com.

1/18/2026

Renault Captur BCM Pinout to Xhorse Multi Prog

Trying to clone this BCM for a Renault Captur. Where to find the pinout for Xhorse Multi Prog?

Renault Captur BCM Pinout to Xhorse Multi Prog 1

Renault Captur BCM Pinout to Xhorse Multi Prog 2

Here it is.

Multi prog pinout to Renault Captur BCM.

MCU Processor:  SPC560B60L5

Renault Captur BCM Pinout to Xhorse Multi Prog 3

Xhorse Multi Prog Read and Write MG HS 2022 MED17.8.10 ECU

Xhorse Multi Prog new user feedback:

Read and write MG HS 2022 MED17.8.10 ECU successfully on bench.

Read EEPROM and flash ok,

Write eeprom and flash ok,

IMMO OFF.

Menu path: GreatWall-Hover 6 -Bosch MED17.8.10 TC1728 HW2 protocol.

Xhorse Multi Prog Read and Write MG HS 2022 MED17.8.10 ECU 1

Xhorse Multi Prog Read and Write MG HS 2022 MED17.8.10 ECU 2

Xhorse Multi Prog Read and Write MG HS 2022 MED17.8.10 ECU 3

Xhorse Multi Prog Read and Write MG HS 2022 MED17.8.10 ECU 4

Xhorse Multi Prog Read and Write MG HS 2022 MED17.8.10 ECU 5

Xhorse Multi Prog Read and Write MG HS 2022 MED17.8.10 ECU 6


1/15/2026

Program Mercedes Vito W639 All Keys Lost with VVDI PROG and VVDI MB

If you’re a locksmith or auto key specialist facing an “all keys lost” job on a Mercedes Vito 2008 (W639), this guide is for you. I’ll walk you through the full process using the Xhorse VVDI toolchain – a reliable and efficient method we use daily. No guesswork, just clear steps.


Tools You Will Need:

Xhorse VVDI PROG Programmer – for reading the EIS data

Xhorse VVDI MB BGA Tool – for key programming

Xhorse Key Cutting Machine – for cutting the blade

BENZ HC08 Adapter Board – for W639 EIS reading

EIS Removal Tool Set

Lock Pick Set (optional, for non-destructive entry)


Step 1: Entry & Blade Decoding

  1. We started by gaining access to the vehicle using a lock pick. Once inside, we decoded the door lock to get the mechanical cut code.
  2. Decode result: Positions 1, 2, 3, 5.
  3. This code was sent to cut a new blade using the Xhorse Key Cutting Machine. Having a physical blade ready early speeds up the whole job.

Program Mercedes Vito W639 All Keys Lost with VVDI PROG and VVDI MB 1

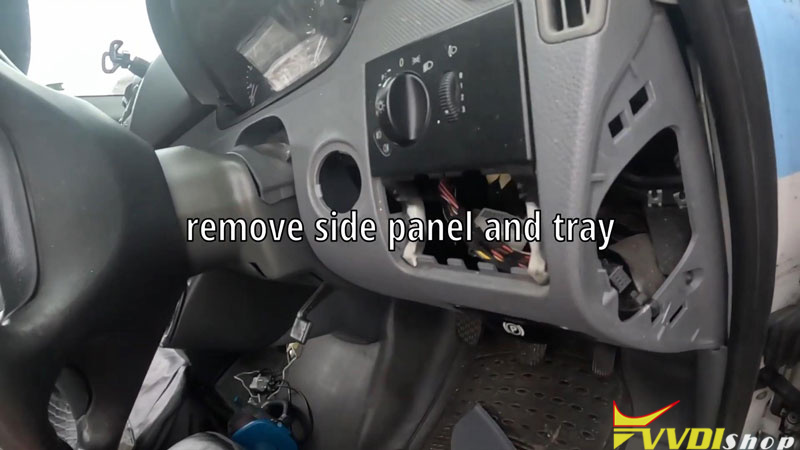
Step 2: Removing the EIS (Ignition Switch)

With the door open, we targeted the EIS. Using a dedicated EIS removal tool, we accessed it through the dash tray – the easiest route on this model.

Tip: Handle the EIS carefully. It holds all the vehicle’s key data.

Program Mercedes Vito W639 All Keys Lost with VVDI PROG and VVDI MB 2


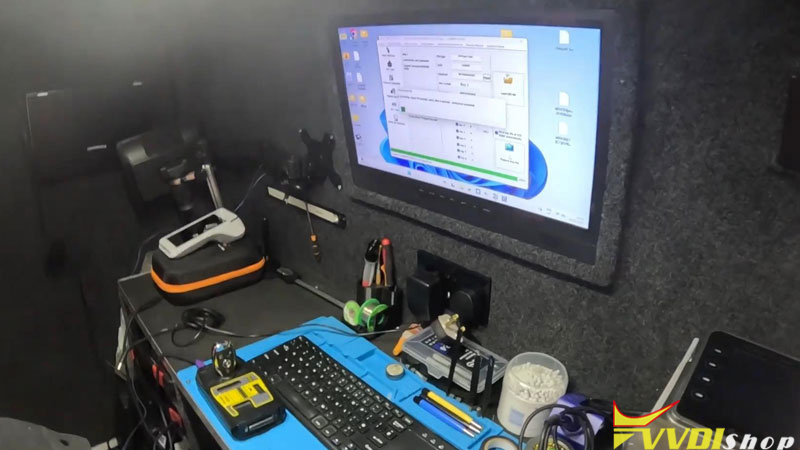
Step 3: Reading EIS Data with Xhorse VVDI PROG

Here’s where the VVDI PROG shines.

  1. Connect the EIS to the programmer using the BENZ HC08 Adapter Board.
  2. Read the switch data in seconds.
  3. Save the file securely.


This step extracts the vehicle’s “key fingerprint.” Without this data, you can’t program a new key.

Program Mercedes Vito W639 All Keys Lost with VVDI PROG and VVDI MB 3

Program Mercedes Vito W639 All Keys Lost with VVDI PROG and VVDI MB 4

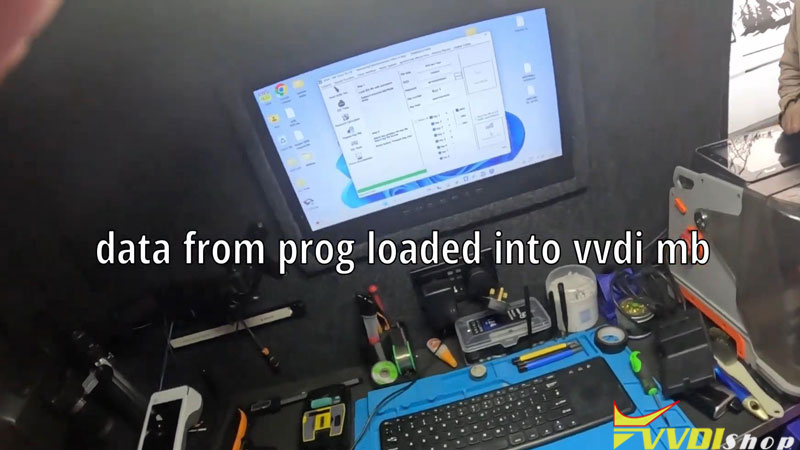
Step 4: Preparing & Writing the Key with Xhorse VVDI MB

Next, we switched to the VVDI MB Tool.

  1. Upload the saved EIS file via the “Prepare Key File” function.
  2. The system generates individual key files – fast and cloud-based.
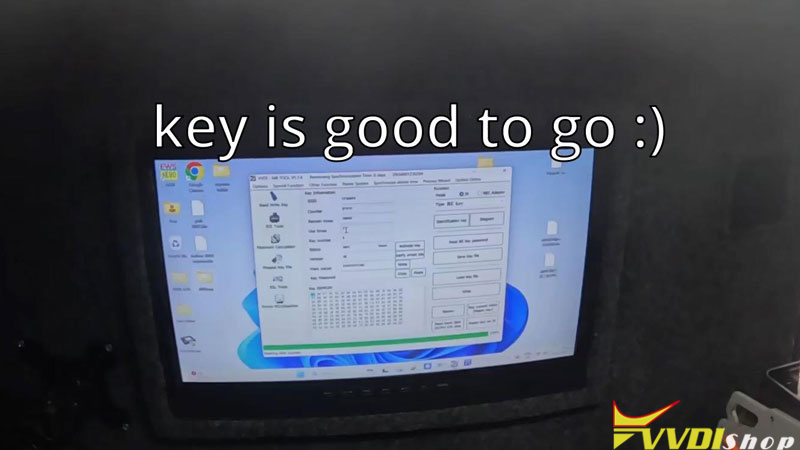
  3. Select the key slot (we used slot 8 for this client).
  4. Write the file to a blank Mercedes key.


The tool confirms everything: key number, SSD data, and usage counter. It’s all integrated and foolproof.

Program Mercedes Vito W639 All Keys Lost with VVDI PROG and VVDI MB 5

Program Mercedes Vito W639 All Keys Lost with VVDI PROG and VVDI MB 6

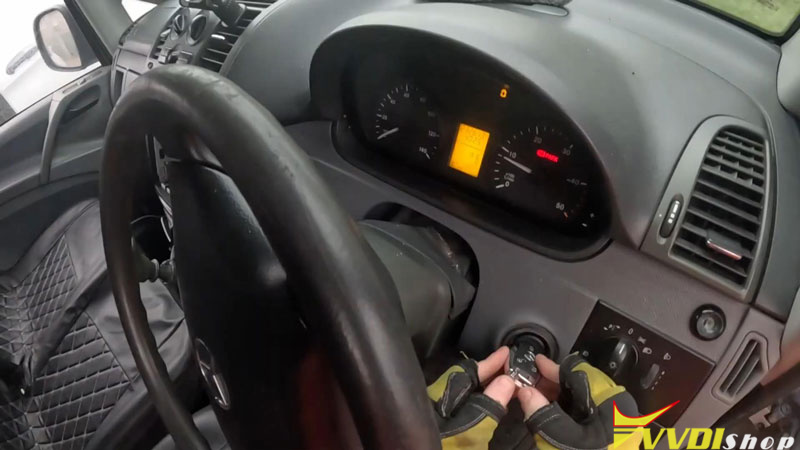
Step 5: Testing & Finishing Up

We reinstalled the EIS, reconnected all plugs, and tested the new key.
Result: The van started immediately – both the blade and transponder worked perfectly.

Program Mercedes Vito W639 All Keys Lost with VVDI PROG and VVDI MB 7

Why This Method is a Game-Changer

Using Xhorse VVDI PROG + VVDI MB turns a complex “all keys lost” job into a streamlined process:

  • No diagnostics needed
  • Fast reading and writing
  • Reliable results
  • Works on Vito, Sprinter, and similar Mercedes models


Get the Tools:

Ready to tackle Mercedes key jobs with confidence?

Visit www.vvdishop.com for full toolkits and bundles.

1/13/2026

Xhorse Multi Prog Repair Benz W206 48V Lithium Battery

 How to repair a Mercedes-Benz 48V battery control unit with Xhorse Multi Prog?

This case highlights a common but complex fault in modern vehicles, where a simple voltage spike or battery-related event can corrupt the core software of a component, requiring deep electronic intervention rather than simple replacement.


The issue stemmed from a voltage spike, likely during a jump-start or battery replacement, which caused a critical failure. The module’s primary files—P-Flash 1 and P-Flash 2—were corrupted. These files contain the main microcontroller (MCU) firmware. Notably, the corruption extended beyond the main program to the D-Flash (data flash or EEPROM), which stores learned values, adaptation data, and fault histories.


The Repair Process: A Step-by-Step Reflash

Physical Connection: The module was connected via a dedicated programming interface. We emphasize the importance of accurate wiring, referencing saved pinout diagrams. We noted a discrepancy in official documentation regarding a specific yellow wire’s solder point but confirmed his connection method was reliable based on successful communication.

Xhorse Multi Prog Repair Benz W206 48V Lithium Battery 1

Xhorse Multi Prog Repair Benz W206 48V Lithium Battery 2

Multi-prog will show how to repair this battery module:

Xhorse Multi Prog Repair Benz W206 48V Lithium Battery 3

File Preparation and Writing: Three key files were prepared:

  • A corrected P-Flash 1
  • A corrected P-Flash 2
  • A “cleaned” or corrected D-Flash file

The process began by erasing the old data and sequentially writing the new P-Flash 1, P-Flash 2, and D-Flash files to the module.

Verification is Key: After each write cycle, a verification step was initiated to ensure the data was written correctly and without errors. This step is crucial to confirm the integrity of the repair.

Troubleshooting a Glitch: During the procedure, the process interrupted during the P-Flash 2 verification. Undeterred, we manually restarted the write cycle for that specific file, demonstrating the hands-on problem-solving often required in board-level repair. The process then continued successfully.

Xhorse Multi Prog Repair Benz W206 48V Lithium Battery 4

Xhorse Multi Prog Repair Benz W206 48V Lithium Battery 5

Xhorse Multi Prog Repair Benz W206 48V Lithium Battery 6

Xhorse Multi Prog Repair Benz W206 48V Lithium Battery 7

Xhorse Multi Prog Repair Benz W206 48V Lithium Battery 8

1/08/2026

Xhorse Multi Prog Volvo KVM Overcurrent with XDNP27 Adapter

 How to solve Xhorse Multi Prog Volvo KVM VDD overcurrent error when using KVM XDNP27 adapter?

Xhorse Multi Prog Volvo KVM Overcurrent with XDNP27 Adapter 1

Xhorse Multi Prog Volvo KVM Overcurrent with XDNP27 Adapter 2

Xhorse Multi Prog Volvo KVM Overcurrent with XDNP27 Adapter 3

This instrument is currently indicating VDD overcurrent, which means there is excessive current.
Select VDD, change from 5V to 3.5V.
We can adjust it from 3.3 to 5.2V
But we will set the lowest voltage to VDD 3.5V because this box is burned out.

Xhorse Multi Prog Volvo KVM Overcurrent with XDNP27 Adapter 4

If VDD still overvoltage, so we adjust it further to VCC, bringing it down to 3.5V.
Xhorse Multi Prog Volvo KVM Overcurrent with XDNP27 Adapter 5
Decoding the chip. The chip is currently being read.
Chip decoded successfully. This means it has now been successfully read.

Xhorse Multi Prog Volvo KVM Overcurrent with XDNP27 Adapter 6
Then read Flash.

Xhorse Multi Prog Volvo KVM Overcurrent with XDNP27 Adapter 7

Read eeprom and flash successfully.