11/30/2022

Generate Xhorse VVDI 754J 868Mhz but Shows 434Mhz

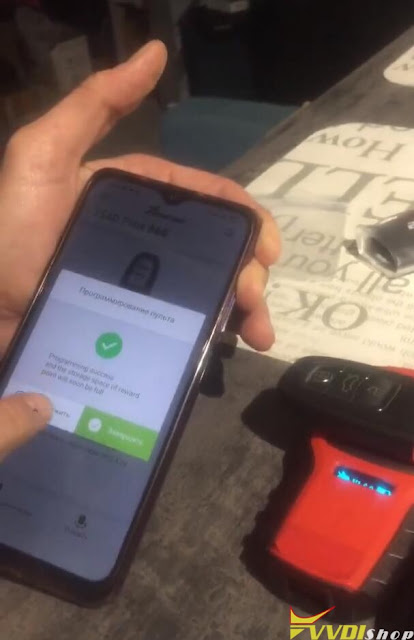
 Q: I bought a Xhorse XSADJ1GL VVDI 754J universal Smart Remote Key for Audi ( Immo 5 , BCM 2 system).  I can’t prepare 868 MHz . 315 and 433 MHz prepared ok. But when I try to create 868Mhz with vvdi mini key tool I get key with 433 MHz. It seems that is 434 but works good after programming. Any have idea?

Generate Xhorse VVDI 754J 868Mhz but Shows 434Mhz 1

Generate Xhorse VVDI 754J 868Mhz but Shows 434Mhz 2

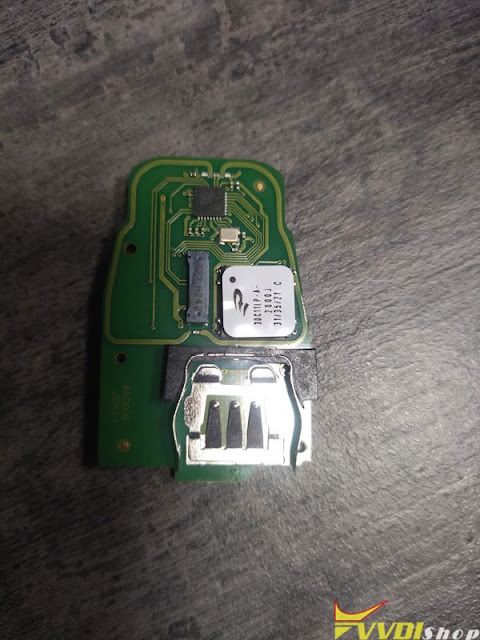
The board key has marked AD006 Ver 1.1.

Generate Xhorse VVDI 754J 868Mhz but Shows 434Mhz 3

Generate Xhorse VVDI 754J 868Mhz but Shows 434Mhz 4

Generate Xhorse VVDI 754J 868Mhz but Shows 434Mhz 5

Generate Xhorse VVDI 754J 868Mhz but Shows 434Mhz 6

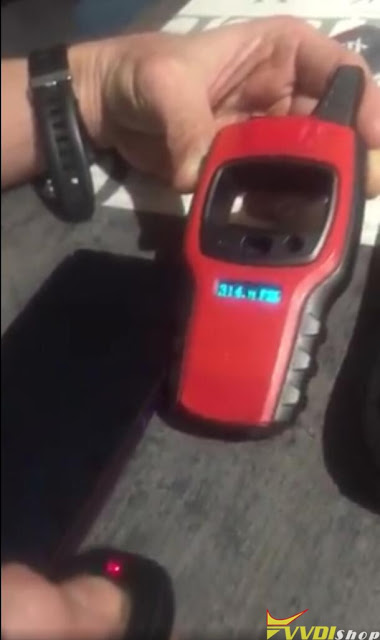
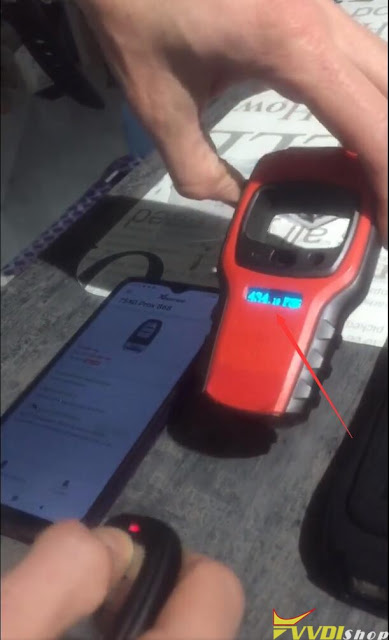
After generate 868mhz remote, both mini key tool and keydiy kd-x2 detect the frequency as 434mhz.

Generate Xhorse VVDI 754J 868Mhz but Shows 434Mhz 7

Generate Xhorse VVDI 754J 868Mhz but Shows 434Mhz 8

Solution:

Kd and mini key tool xhorse cannot read 868mhz that’s why. 868MHz signal is weak. Sometimes cannot be detected by major key tools on the aftermarket.

VVDI 754J AD006 is new one, old one was just 315, if he generates 433mhz and 315mhz, = is new pcb. (The Key produced before 20.04.22 can’t be prepared with other Mhz)

It works just try it. It keeps showing 434Mhz but it works.

IT shows 434 But IT will work as 868mhz. Just generate IT and code to car. It works fine after programming.

11/24/2022

Xhorse VVDI Mini Prog Read 2013 Subaru BRZ EEPROM

 How to use Xhorse VVDI Mini Prog to read 2013 Subaru BRZ EEPROM on an ECU certification module? It’s not allowed reading by pressure, but can work with EEPROM adapter. Following I’m gonna show the procedure.


Preparation

As you can see, this is the EEPROM MCU what I’m going to remove. I covered with aluminum foil so that the aluminum foil can absorb most of the heat.


It’s always very imperative and important that you mark position 1 on the chip until closest place on the board. Or you can remember where 1 is at. But on this board, it’s particularly right here where it says R074. There’s a little narrow pointing into pin number 1.


I’m gonna line it up into the XDNP10 EEPROM Adapter chip slot.

Xhorse VVDI Mini Prog Read 2013 Subaru BRZ EEPROM 1

Xhorse VVDI Mini Prog Read 2013 Subaru BRZ EEPROM 2

Xhorse VVDI Mini Prog Read 2013 Subaru BRZ EEPROM 3

Xhorse VVDI Mini Prog Read 2013 Subaru BRZ EEPROM 4

Read EEPROM Data

Go to Mini Prog app:

EEPROM and FLASH >> SEIKO >> S-93C86BD >> Read >> EEPROM >> Start operation

Press START button on Mini Prog.

Press “Save and edit”, we can see the data directly.

Save the file.


Data file path:

File management >> Local file >> Date >> File

Put the other key to VVDI Key Tool Plus or something tool like that, I can utilize that file. By uploading the file to Xhorse cloud so that my other devices can access it as well.

Xhorse VVDI Mini Prog Read 2013 Subaru BRZ EEPROM 5

Xhorse VVDI Mini Prog Read 2013 Subaru BRZ EEPROM 6

Xhorse VVDI Mini Prog Read 2013 Subaru BRZ EEPROM 7

Key Programming

Immo programming >> Toyota >> Select by type >> Smart key system >> All smart remotes lost >> Generate emergency key >> OK >> OK >> OK >> My data >> Select data file >> Download >> Download here >> Save


Now I can load the file to generate a Subaru key with 78 type.

Xhorse VVDI Mini Prog Read 2013 Subaru BRZ EEPROM 8

Xhorse VVDI Mini Prog Read 2013 Subaru BRZ EEPROM 9

Xhorse VVDI Mini Prog Read 2013 Subaru BRZ EEPROM 10

Xhorse VVDI Mini Prog Read 2013 Subaru BRZ EEPROM 11

Xhorse VVDI Mini Prog Read 2013 Subaru BRZ EEPROM 12

www.vvdishop.com

11/23/2022

How to Solve VVDI Prog Renesas V850 “Try Frequency Failed"

 Here are the common solutions to xhorse vvdi prog Renesas V850 MCU “Try Frequency Failed” error.

How to Solve VVDI Prog Renesas V850 “Try Frequency Failed"

Solution:

1). Double check the wiring connection

2). Change tension to lower (0.1 as standard)

3). If always try frequency failed even changing tension, change another power adapter.

4). If all failed, the V850 is encrypted. vvdiprog cannot read it.

Xhorse Cloned Remote Lock Button Not Work?

 Problem:

I tried to clone a 2011 Kia Rio remote with xhorse key tool max pro today. Using wired two-button remote. After cloning – the new remote will unlock occasionally – but lock button doesn’t work. Tried it on a 2013 Peugeot Boxer today too. Didn’t work.  Any thoughts? Is this one that won’t clone and needs to be learned.
Solution:
Just program into car as most Kia and Hyundai don’t need pin to program in.
Cloning only works for some garage openers without rolling code.

Better not clone remotes! Produce one and code to vehicle.

How to Solve Cannot Find Xhore App in Play Store?

Question: Does anyone know why the Xhorse app is not in the Play store? on Android the app does not appear. Or will they have it to share?


Answer:

Scan the QR code here to link your xhorse account if not find app in the Google play store.

Cannot Find Xhore App in Play Store

For iOS system, directly search and download xhorse app on Apple google play store or download here,


https://apps.apple.com/us/app/xhorse/id1440550587

11/21/2022

Can Xhorse Key Tool Renew BMW PCF7944 Key?

 Need renew bmw keys, chip different, PCF7944, will xhorse vvdi mini key tool do it?

Xhorse Key Tool Renew BMW PCF7944 Key 1

Xhorse Key Tool Renew BMW PCF7944 Key 2

Solution:

This PCF7944 is the 1st generation of this type keys.
7944 can’t renew but can program to car by back door. Pcf7944 keys are cheap also.
This cheap can be fully read out, then its data can be successfully written to cas 2 or cas3
Use proper programmer to adapt to CAS.
But you need to remove CAS.

11/16/2022

Change W164 EZS with NEC Processor with VVDI MB Tool

 Is it possible to change Mercedes W164 EZS and AMAZONAS with NEC based processor? I have VVDI Prog, but it can do Motorola MCU, not Nec. What solution is possible? Only make Virgin ECU, ISM and adapt used EZS? Can i do this with VVDI MB or CGDI MB?

This is photo of plate inside EZS.

Change W164 EZS with NEC Processor with VVDI MB Tool

Here step by step instructions for replacing EZS:

change steps with VVDI MB Tool:

1. Use ezs & key from one vehicle

2. Read and save (1) once ezs data via obd. (new ezs)

3. Calculate key password from new ezs in password calculate menu (new ezs) !!!!!!!!!!!

Attention!!! Do not insert key in ezs anymore, before all procedure will ended!!!!

4. Calculate erase password in ezs menu (new ezs)

5. Paste key password you calculated (same menu)

6. Save EZS data(2)

7. Renew ezs via IR (new ezs) Now new ezs ready!

8. read old ezs via obd (old ezs key NOT inserted) !!!!!!!!!!!

Attention!!! Do not insert key in ezs anymore, before all procedure will ended!!!!

9. Save ezs data (3)

10. Replace original ezs to new

11. Load ezs data, saved from ori ezs (3)

12. Write VIN number via obd 13. Choice IR and write data, that you have read from ori ezs (3) via IR KEY PASSWORD MUST BE FROM NEW EZS

14. Read and save ezs data again (4)

15. Go to calculate key menu, load dump (4)

16. Paste key password and push “calculate”

17. save calculated dumps

18. Get key from new ezs and disassemble it

19. desolder NEC ic and put it to NEC Adapter

20. use “key” menu, choose “nec adapter” and read IC

21. Renew ic

22. solder Nec ic back to plate.

23. choice IR and insert key into vvdi ir key reader

24. Read key for check it have “unuse” status

25. load dump of key (step 17) and write key via IR (choice version 51 number of key is not important)

NOW YOU CAN INSERT YOU WRITED KEY IN EZS. Sometimes key will work after 3 times be inserted. The procedure will take one token.


The procedure can be applied to cgdi as well.

https://www.vvdishop.com/service/change-benz-ezs-with-nec-processor-with-vvdi-mb-tool.html

11/15/2022

Xhorse VVDI XT15 Chip Used as PCF7935 ID33

 One of our customers did the first test with xhorse vvdi 7935 xt15 chip on a VW Caddy 1997 successfully.

So it could be a cheap alternative to the now expensive original 7935 transponders.

Xhorse VVDI XT15 Chip Used as PCF7935 ID33 1

Xhorse VVDI XT15 Chip Used as PCF7935 ID33 2

Read Caddy 3D33J immo data with programmer.

Then in VVDI2 software, select Euro->VW-> Immobox-  Motorola based

Then load EEPROM dump

Xhorse VVDI XT15 Chip Used as PCF7935 ID33 3

Xhorse VVDI XT15 Chip Used as PCF7935 ID33 4

Select key position 2
Make dealer key

Choose chip type PCF7930 (7931, 7935)

Xhorse VVDI XT15 Chip Used as PCF7935 ID33 5

Xhorse VVDI XT15 Chip Used as PCF7935 ID33 6

Start make key
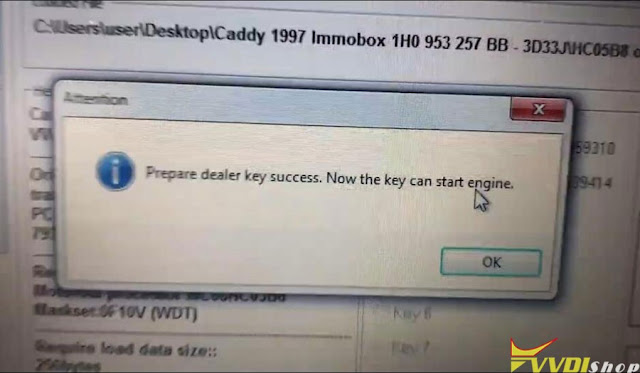
Prepare dealer key success

Xhorse VVDI XT15 Chip Used as PCF7935 ID33 7

Xhorse VVDI XT15 Chip Used as PCF7935 ID33 8

The vvdi xt15 key can start engine now.

Xhorse VVDI XT15 Chip Used as PCF7935 ID33 9

Xhorse VVDI XT15 Chip Used as PCF7935 ID33 10

Done.

11/13/2022

Reset 2014 Range Rover KVM with Xhorse Mini Prog

 Today I wanna use Xhorse VVDI Mini Prog to reset 2014 Range Rover KVM module. As it’s all keys lost, I should remove the KVM module to write virgin files. After successfully reset, just write back to the key.


In the process, I’ll use the special Xhorse XDNP16 Adapter that allows you to work without soldering. For some reasons, the VVDI Mini Prog programmer has been underestimated. But in my opinion, it’s a very worthwhile device, especially in sudden situations on the road. Without further ado, let’s get start.

Reset 2014 Range Rover KVM with Xhorse Mini Prog 1

Reset 2014 Range Rover KVM with Xhorse Mini Prog 2

Preparation

  1. Remove the KVM module, and dismantled its processor.
  2. Install & fix solder free adapter to KVM module.
  3. Connect KVM to VVDI Mini Prog.

Reset 2014 Range Rover KVM with Xhorse Mini Prog 3

Reset 2014 Range Rover KVM with Xhorse Mini Prog 4

Operation

Go to Xhorse app to start reading:

Immo >> Land Rover >> RFA – SECURED(MC9S12XEQ384) >> Adapter

As you can see, here we can read, write, erase, read/write partition, unlock/lock the data. But I just need to write virgin data files to reset the KVM module. The files you can either buy or search somewhere on the Internet.

Reset 2014 Range Rover KVM with Xhorse Mini Prog 5

Reset 2014 Range Rover KVM with Xhorse Mini Prog 6

Reset 2014 Range Rover KVM with Xhorse Mini Prog 7

I’ve transferred the files and download to phone previously, so directly press

Write >> D-FLASH >> Load D-FLASH file >> Write >> Start >> Continue

Write completely.


Write >> EEE >> Load EEE file >> Write >> Start >> Continue

Write completely.


Write >> P-FLASH >> Load P-FLASH file >> Write >> Start >> Continue

Write completely.

  • FLASH is the largest file, make sure the phone is connected to WiFi and does not fall asleep to speed up. It may take about 5 mins.)


Write >> POF >> Load POF file >> Write >> Start >> Continue

Write completely.

Reset 2014 Range Rover KVM with Xhorse Mini Prog 8

Reset 2014 Range Rover KVM with Xhorse Mini Prog 9

Reset 2014 Range Rover KVM with Xhorse Mini Prog 10

Reset 2014 Range Rover KVM with Xhorse Mini Prog 11

Reset 2014 Range Rover KVM with Xhorse Mini Prog 12

The KVM module has been successfully reset.

Now I can put KVM back to the car to register keys.

www.vvdishop.com