1/24/2021

How to Set up Xhorse Software on Win10 without Antivirus?

 Question:

Anyone else having problems with the latest xhorse vvdiprog software and windows 10?
The Windows defender keeps deleting it. Can’t get the windows defender to turn off and stay off to fix it.
Some Xhorse antivirus software prevent you from downloading and installing the software after you have installed it.  Here’s solution to solve Win10 antivirus issues for Xhorse VVDI2, VVDI MB or VVDI BMW Software to prevent interference from your antivirus software. 

Users can extract the file from a zip/rar file or use an Installer to install Xhorse software. Both of these require the following steps before you download, install and use any Xhorse software.

1: Turn off Anti-virus and Windows Security/Defender 

Go to the Windows icon in the bottom left corner of the screen and input  “Windows Security” and click the blue icon with a white shield that pops up under “Best match”.

The “Windows Security” panel will be displayed

xhorse-software-win10-1

Then go to “Virus & threat protection settings“

Click the shield icon with a small warning symbol in the bottom right corner.

Then it comes with this windows.  Check the”Real-time protection” option. It is set to “ON” by default. You need to turn this to “OFF“

xhorse-software-win10-2

If you have any other antivirus software you will also need to disable them during download. Each antivirus software will have its own how-to guide on how to deactivate them when downloading from a trusted source.

Step 2: Download Xhorse Software 

Vvdishop.com provides you latest Xhorse software download for free, check http://www.vvdishop.com/info/vvdishop-software-download-30.html

Remember where your xhorse software have been stored on your device.  If the files came as Zip or Rar download then keep note of where you extracted the files as you’ll need this in Step 3. If you used an installer as is common with VVDI2, then you will need to keep a note of where the installer has placed the software files. Such as: C Drive > Program Files > Xhorse.

Step 3: Add folder to Windows Security Exclusion List

You will need to exclude the installed Xhorse files, as once your antivirus software is reactivated it will scan your computer regularly for viruses. The antivirus software will often identify your Xhorse files as a virus, so to avoid the software being corrupted you need to add them to your antivirus exclusion list.

Go back to the ‘Windows Security‘ panel then ‘Virus & threat protections‘. Scroll down to Exclusionsand click ‘Add or remove exclusions‘. This will take you to a new interface called ‘Exclusions’ with a button shaped like a plus sign which says ‘Add an exclusion‘. Click this and select ‘Folder‘ from the dropdown menu, then simply navigate to your extracted or installed Xhorse softwares’ folder and click ‘select folder’. This is not the folder where you downloaded the file but the folder where the file will runfrom on your device.

xhorse-software-win10-3

Once again if you have another antivirus software you will need to add the folder containing your Xhorse software to its exclusion list.

Step 4: Reactivate “Real Time Protection” 

Go back to Virus & threat protection and turn ‘Real-time protection’ to “ON” to prevent any threats from Malware. Your Xhorse software will now be ready to use and protected from your antivirus software.

xhorse-software-win10-4

https://www.vvdishop.com/service/install-xhorse-software-on-windows-10.html

1/15/2021

VVDI Key Tool Max Adds A Ford Focus 2014 Key

 How to add a new key for Ford Focus 2014 with Xhorse VVDI Key Tool Max? Today I’m gonna program the key for this vehicle.


Prepare for 2 keys, one original key, and one new smart key to be programmed.


Steps


  1. Generate remote

Put the new key into VVDI Key Tool Max slot:

Vehicle remote >> Ford >> Focus >> CWTWB1U793 11-12 5btn 1717 >> Generate remote

vvdi-key-tool-max-2014-ford-focus-1

vvdi-key-tool-max-2014-ford-focus-2

vvdi-key-tool-max-2014-ford-focus-3

vvdi-key-tool-max-2014-ford-focus-4

Wait until displaying “Burn success”, then the new key is ready for copying.


This key has already been programmed before, so I will go access to next step directly.


  1. Clone

Put the original key into VVDI Key Tool Max slot, press the shortcut button on right side:

Read transponder >> Clone >> Start clone

vvdi-key-tool-max-2014-ford-focus-5

vvdi-key-tool-max-2014-ford-focus-6

vvdi-key-tool-max-2014-ford-focus-7

Successful data upload.


Calculating…


Calculate success.


Remove the original key, change the new key into VVDI Key Tool Max slot instead.


Detected VVDI super chip…


Successful copy, press “Complete” to finish.

vvdi-key-tool-max-2014-ford-focus-8

vvdi-key-tool-max-2014-ford-focus-9

vvdi-key-tool-max-2014-ford-focus-10

vvdi-key-tool-max-2014-ford-focus-11

Now let’s test the new key to check whether it works, alright, it can normally start the engine, and the remote is fine.


Key programming has done!

vvdi-key-tool-max-2014-ford-focus-12

It is so easy to use VVDI Key Tool Max Key Programmer to add a key, it only takes me 3 minutes to compete.

https://www.vvdishop.com/

http://blog.vvdishop.com/add-a-ford-focus-2014-key-with-vvdi-key-tool-max/

1/10/2021

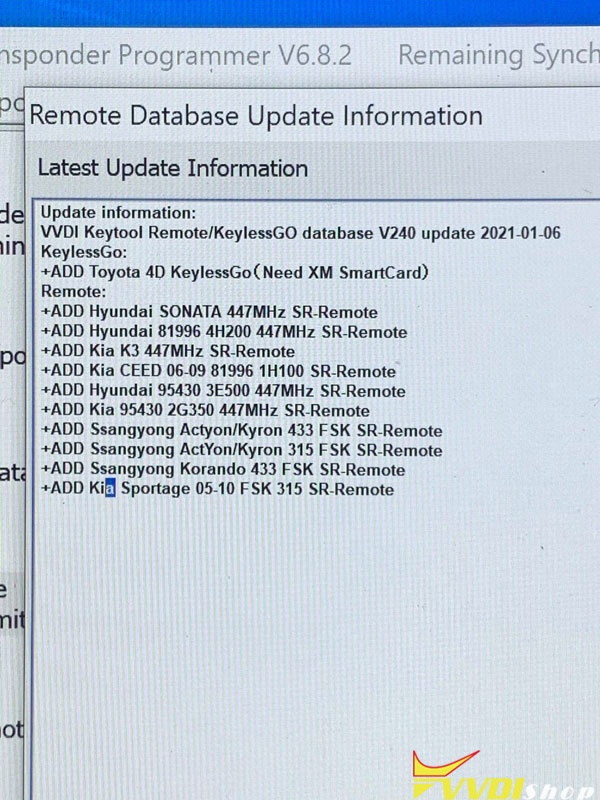
VVDI2 Remote/KeylessGO database V240 Update

 Xhorse VVDI Key tool/VVDI2 Remote/KeylessGO database V240 update

2021-01-06
KeylessGo:
+ADD Toyota 4D KeylessGo (Need XM SmartCard)
Remote:
+ADD Hyundai SONATA 447MHz SR-Remote
+ADD Hyundai 81996 4H200 447MHz SR-Remote
+ADD Kia K3 447MHz SR-Remote
+ADD Kia CEED 06-09 81996 1H100 SR-Remote
+ADD Hyundai 95430 3E500 447MHz SR-Remote
+ADD Kia 95430 2G350 447MHz SR-Remote
+ADD Ssangyong Actyon/Kyron 433 FSK SR-Remote
+ADD Ssangyong Actyon/Kyron 315 FSK SR-Remote
+ADD Ssangyong Korando 433 FSK SR-Remote
+ADD Kia Sportage 05-10 FSK 315 SR-Remote

vvdi2-remote-database-v240


1/04/2021

How to Fix VVDI MB Can not find W639 erase password?

 Problem:

It tells “Can not find erase password!” when I am using Xhorse VVDI MB Tool to start and load W639 EIS data. What is the problem? Please help me!

vvdi-mb-w639-cannot-read-pass-1

vvdi-mb-w639-cannot-read-pass-2

Solution:

1).

By W639 EIS ESL test cable

Hooking up MB power adapter and W639 EIS ESL test cable 

vvdi-mb-w639-eis-test-cable-1

vvdi-mb-w639-eis-test-cable-2

Connect VVDI MB with mb power adapter, W639 EIS, EIS test cable and IR reader as picture shown below:

vvdi-mb-w639-eis-test-cable-3

vvdi-mb-w639-eis-test-cable-4

Run VVDI MB software, start data acquisition

vvdi-mb-w639-eis-test-cable-5

vvdi-mb-w639-eis-test-cable-6

vvdi-mb-w639-eis-test-cable-7

Save EIS data and upload to calculate password

vvdi-mb-w639-eis-test-cable-8

The password calculation procedure takes 9 minutes around.


2).

By using combination tool, i.e Extreme MB tool 

Step 1. Start up Extreme MB tool software, click “Sonder Hash Online Calculator”.

vvdi-mb-w639-eis-test-cable-9

Step 2. Copy special key “12B281A5893FFE9E” on VVDI MB Tool and paste it to “Sonder Hash”, click “Calculate”.

vvdi-mb-w639-eis-test-cable-10

vvdi-mb-w639-eis-test-cable-11

Step 3. Copy dealer password generated, paste it to VVDI MB BGA Tool “Erase Pass”, select “Allow user” option meanwhile.

vvdi-mb-w639-eis-test-cable-12

vvdi-mb-w639-eis-test-cable-13

Click “Save EIS data”, select the original EIS file to replace.

Save >> Yes >> OK >> Save

vvdi-mb-w639-eis-test-cable-14

vvdi-mb-w639-eis-test-cable-15

vvdi-mb-w639-eis-test-cable-16

vvdi-mb-w639-eis-test-cable-17

Step 4. Completed.

Select IR mode in EIS function, now the EIS can be renewed.

vvdi-mb-w639-eis-test-cable-18

Problem was solved!


3).

By backup MB programmers, CGDI MB, Autel IM608 etc

For example: calculating W639 password by CGDI MB and AC adapter fast cable, reading pass in less than 9 minutes

cgdi-mb-w639-read-pass-1

cgdi-mb-w639-read-pass-2

cgdi-mb-w639-read-pass-3

cgdi-mb-w639-read-pass-4

cgdi-mb-w639-read-pass-5

www.vvdishop.com

http://blog.vvdishop.com/vvdi-mb-tool-can-not-find-w639-erase-password/


1/03/2021

Xhorse VVDI Prog V4.9.8 Software Free Download

 Xhorse VVDI Prog programmer new software V4.9.8 has released on Dec. 31, 2020.


VVDIProg v4.9.8 (2020-12-31)
* This version DON’t need update firmware

DOWNLOAD link 

+ Add VVDI PROG USER MANUAL 4.9.8 version in Doc folder
+ Add AT25SF041 options in <1-EEPROM&FLASH>-><ADESTO>
+ Add AK93C45, AK93C55, AK93C65 options in <1-EEPROM&FLASH>-<AKM>
+ Add AT24RF08, AT34C02 options in <1-EEPROM&FLASH>-><ATMEL>
+ Add EN25B05 options in <1-EEPROM&FLASH>-><EON>
+ Add MB89RC04, MB89RC16 options in <1-EEPROM&FLASH>-><FUJITSU>
+ Add M24M01, M24M02 options in <1-EEPROM&FLASH>-><ST>
+ Add Y25F05 options in <1-EEPROM&FLASH>-><YMC>
+ Add R5F10Yx4x_Flash_1KB_Write, R5F10Yx6x_Flash_2KB_Write, R5F10Yx6x_Flash_4KB_Write options in <2-MCU>-><RENESAS-RL78-G10>
+ Add R5F105_Data_2KB_Write, R5F105xAx_Flash_16KB_Writeoptions in <2-MCU>-><RENESAS-RL78-G11>
+ Add R5F102/103x6x_Flash_2KB_Write,R5F102/103x6x_Flash_4KB_Write,
R5F102/103x6x_Flash_8KB_Write,R5F102/103x6x_Flash_12KB_Write,R5F102/103x6x_Flash_16KB_Write
options in <2-MCU>-><RENESAS-RL78-G12>
+ Add R5F113_Data_8KB_Write, R5F113_Data_16KB_Write, R5F113xGx_Flash_128KB_Write, R5F113xHx_Flash_192KB_Write,
R5F113xJx_Flash_256KB_Write,R5F113xKx_Flash_384KB_ Write,R5F113xLx_Flash_512KB_Write options in <2-MCU>-><RENESAS-RL78-F15>
+ Add CS75-HAND-BREAK-MODULE option in <8-OTHERS-><CHANGAN>
+ Add FOCUS-BCM-R7F701053(2019)m option in <8-OTHERS-><FORD>
+ Add MKC-BCM option in <8-OTHERS-><LINCOLN>


www.vvdishop.com