Xhorse VVDI2 key programmer released new software version 7.0.9 on Sep. 13th, 2021.
9/13/2021
Xhorse VVDI2 Software Update to V7.0.9
Can Xhorse Super Chip be used to Write Key PCF7935?
Problem:
Write Superchip as VW id33 first.
9/09/2021
Xhorse Mini Key Tool vs Key Tool Max
Question:
How to Write Volvo V70 93C66 Key with Xhorse VVDI2
Question: I need to write key on Volvo V70 1998- with 93ะก66 and pcf7935 with Xhorse vvdi2 key programmer. When loading eeprom data, free positions 4, 5 and 6 are not available for writing. How to solve this issue?
9/08/2021
Xhorse VVDI Key Tool Max Unlock GM Buick/Chevy Key
I’ve got a five-button GM flip key, it’s actually locked to a vehicle. It can’t be reused until it was unlocked. So I’m gonna use the Xhorse Renew Adapter here working with VVDI Key Tool Max to unlock it.
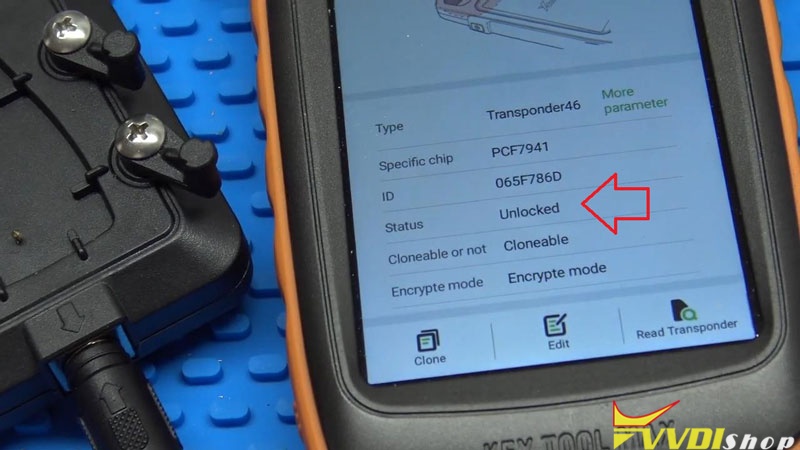
As you can see, the GM proximity card is indeed locked.
To unlock key, it needs to disassemble the key shell and take out main board.
Put the board in button side up properly on Renew Adapter.
Go back to Key Tool Max,
Special function >> Remote renew >> Buick Chevrolet >> 5BTN smart key 315Mhz F7952E >> Unlock
Note: If it didn’t identify the key and renew failed, try to press down the pins of board that are actually spring-loaded. Push down on them to make sure the pins contact are good.
It’ll process automatically…
Renew success.
Such quick!
Let me read transponder again, look, it is unlocked.
Done!
So now I can reuse the key to other vehicles. The Renew Adapters Set is including 12 adapters, supports to work with VVDI Key Tool Plus or Mini Key Tool for different original remote keys unlocking.
9/06/2021
Renew Dodge Fobik with Xhorse Key Tool Max
Today I’m gonna to use Xhorse VVDI Key Tool Max and the Renew Adapters Set just purchased to unlock an OEM Dodge Fobik key. Once it is unlocked, it’ll be able to learn to another car.
The Renew Adapters Full Set has 12 adapters, with this particular set you can do all kinds of vehicles. Instead of having to solder wires to the board, these adapters actually just line up the board where it needs to be and allows the Fobik to be unlocked.
How to unlock Dodge Fobik key?
Here is the OEM Dodge Fobik key.
The Key Tool Max and Renew Adapter No.10 are connected.
As you can see, the Fobik key is “Already locked”.
Open its outer shell, to put the circuit board properly in Renew Adapter.
Press on Xhorse Key Tool Max,
Special function >> Remote renew >> Chrysler & Jeep & Dodge >> Select correct FCC ID: IYZ-C01C M3N5W783X >> Unlock
Renew in process, wait until 100%…
Renew success.
Let’s get the key out to check info again.
As you can see, it is “Unlocked” now, and still outputting a signal.
All right, it’s all good done!
Renew Dodge Fobik key successfully via Xhorse Renew Adapter & VVDI Key Tool Max.
Solved VVDI Prog ‘Device Error Check USB Driver’
Here comes the proper solution to xhorse vvdi prog device error.
The problem goes like this:
9/01/2021
How to Add Mazda 3 2018 KeylessGo by Xhorse Smart Key Box?
Xhorse Smart Key Box can be used to add keyless entry/ keyless go functions on 2018 Mazda 3 successfully. Before that, I’ll use Xhorse VVDI Key Tool Max + MINI OBD Tool to add a remote and demonstrate how it works.
- Generate Smart Remote
Remove PCB board from key shell to be programmed, place it on the VVDI Key Tool Max coil.
Vehicle remote >> Mazda >> 3 hatchback(2014-208) KeylessGo ID49 315M >> Generate
Burn success.
- Program Smart Remote
Insert MINI OBD Tool into the vehicle OBD port,
Immo programming >> Mazda >> Select by regional car model >> USA >> Mazda3 >> Smart key system >> 2017- >> Start execution
Follow the prompts to operate:
Take all smart keys out of car.
Press start button of vehicle for 10s, then press start button again when the indicator light of start button changes to yellow.
Operation completed!
Add a key >> OK >> Yes
Please switch ignition on.
Current number of smart key: 3
Read the password…
Completed to read password, press “OK” to match.
It’ll take about 7 minutes to configuring the system, please wait…
Step on brakes when automatic-shift, step on the clutch when manual-shift and keep the mark end of the smart key to be programmed close to the start button, take other keys out of the car.
Key matched successfully!
Current number of smart keys: 4
After testing the remote successfully, move to next step.
- Install Smart Key Box
- Solder the connections.
Find the included 10-wire rainbow connector and take note of which wires relate to which buttons on the board to make sure the wires are soldered to the correct points.
- Insert to Smart Key Box, turn on Dipswitch position #2(for Prox vehicles).
- Connect Smart Key Box with vehicle properly. (power line, HF/LF antenna, OBD cable)
Sync Remote & Smart Key Box
- Holding the learning button until hearing a beep and LED is ignited.
- Open Smart Key Box app, press “connect the car”.
- Press any Onscreen button to bind phone to the app.
(The Smart Key Box can save and connect 6 remotes or phones at a time in addition to car remote count)
- Once all were done, holding the learning button again to exit learning mode.
- Test The Remote
Place the Smart Key Box safely under seat/dash cavity. Let’s go out to have a test.
Keep the phone screen to test by leaving vehicle and approaching to check all settings are working.
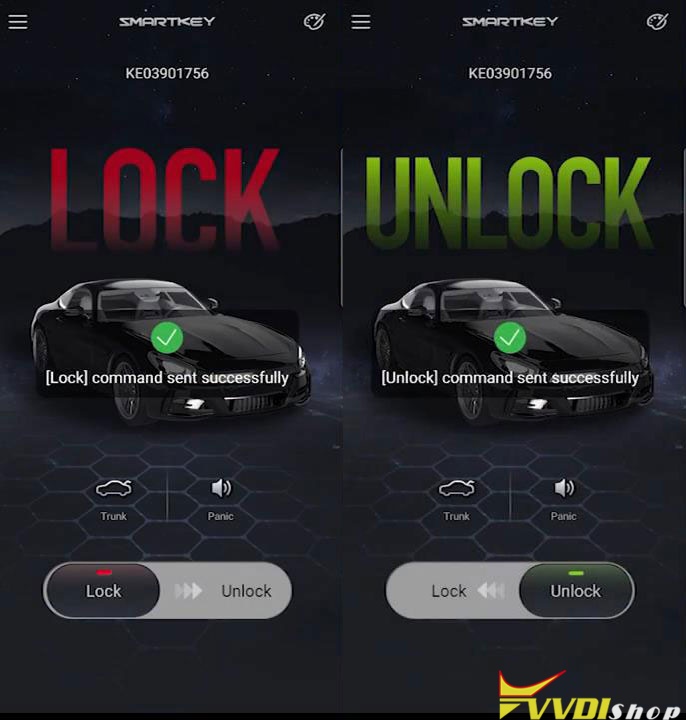
– Go away, it locks.
– As soon as I get to the car, it unlocks.
Perfect done!
This is how to use Xhorse Smart Key Box to work on a 2018 Mazda 3 successfully.